Sunday, February 28, 2016

Winter 2016 Acrylic Class

WINTER 2016 ACRYLIC CLASS Project: Cozy Cottage Week 4

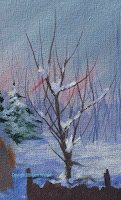
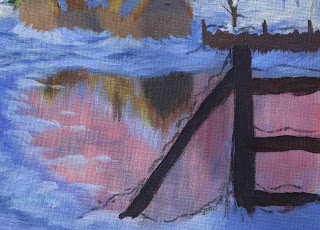
This last class we worked on putting in some intermediate highlights, the snow on the cottage and basing in out wood pile and the fence in front. We only have a couple of weeks left in the semester so you need to get caught up to this point, I do want to finish it before the last class.

Starting with the cottage roof, we need to do a couple of things, one is to add some straw to the roof and some snow. It might be easier for you to add some detail to the straw before adding the snow just know that all's not lost if you do it the other way around, you will just need to be more careful.


The thatching on the roof needs to show some highlights and also some shadows this will be anintermediate highlight using yellow with a touch of burnt sienna and a touch of white for the sunny side, it should be lighter that what is already there. The shadowed sides of the roof use the same color but add a touch of blue to cool the color, depending on how dark you made your original shadows this color could be darker or it may be lighter which is okay, you are just adding some texture to the roof at this point.

Use a flat bristle brush that is not too big for the area but you also don’t want it too small, I was using my #4 however, if you are working on a smaller canvas or your house is smaller you may want to use a #2 flat bristle. This is a dry brush technique so watch the water in your paint – it should be like soft butter – and also in your brush, dry it out before you pick up paint and squeeze the back end of the brush with your paper towel to get out extra moisture, you might also want to spread the bristles and wipe out excess paint before starting.


Before you start to paint stop and think about what you are painting and LOOK at the reference photo. The roof is at an angle, you strokes need to be at the angle of the roof, when you pull down your stroke should look scratchy, you want to see the under painting because this creates texture, that under painting becomes shadows, don’t lose it. Practice before you start on your painting.

I also added the chimney to the roof using burnt sienna; a touch of orange for the sun lit side and added a bit of blue to the color for the shadowed side.

While your roof is drying you can start on the intermediate highlights of the snow. These highlights are not the brightest highlights but they do give depth and texture to your snow as well as shape so they are important. Mix up a cool color starting with your ultramarine blue and purple then add enough white to it to make it one or 2 values lighter than what you have from last week and even a touch of burnt sienna to grey the color slightly. Remember that this is a cool color, if it looks too warm or too brown you will need to add more blue, the sienna should just grey the color slightly.

I know I say this a lot, but look at your reference photo BEFORE you start painting and think about WHAT you are painting and HOW you are going to paint it. Think of the SHAPE you need to paint and the direction it needs to go in, when you paint just blindly you are not going to get the results you want. When I am painting whether it is a demo or a personal painting, I am constantly doing all of the above, that reference photo is my roadmap to my goal and if I don’t follow it I will end up doing it over. There is a lot of thought process going on with each stroke and when you are new to painting that process will take a bit longer but it is essential to your finished painting.
 
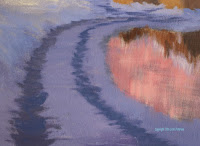
Where the snow drifts up the house your strokes need to follow that drift. When they are creating lumps and bumps in the road they are curves long and short, up and down. They follow the curves of the hillsides leading up to the house, look at the ruts in the road and how the snow sinks in and where it doesn’t, see this before you paint.

You can also use this color to under paint the snow on your trees – the pines behind the house and in the crooks of the leafless trees on the side and the snow patches if your roof is dry. You always need to do a darker under painting no matter what you are painting because this becomes shadows and texture.

While this is drying you can sketch in the wood pile in the back near the house and the fence post in the front. Paint them in with a mix of siena with a touch of blue and purple and also a little white for the background wood pile and same mix without the white for the foreground fence post.

Lastly, when the snow was dry on the trees, I added some highlights. The sun is coming in from the left hand side of the painting so your highlights will be on the left of objects in your painting. Using a mix of white (I use my gesso) with a teeny, tiny touch of orange to slightly tint the white tap in this color in your trees leaving the cool color as shadows.

You can also use this color using a dry brush technique to add a highlight to the ground around the house. Again, do not cover up all the color that’s there because that will be your texture and shadows.


I hope that you have your paintings up to this point because we have a lot of ground to cover before the semester ends. Keep painting and I will see you all in class.

Sunday, February 14, 2016

Winter 2016 Acrylic Class

WINTER 2016 ACRYLIC CLASS PROJECT: Cozy Cottage Week 3

This week we finished getting our underpainting in and putting in our reflection, this is an important step as we progressed through this painting.


While I under painted the snow first, it is probably better practice to put in the reflection first, that way you can size it with the underpainting for the snow and reshape it if you have to. I am going to have to reshape my reflection a little bit next time we meet, but either way it is fine.


The underpainting for my snow is a mix of my ultramarine blue, my purple and white to change the value if you have a little mud on your brush or on your palate you can use that to grey the color just slightly or add just a tiny bit of burnt sienna so that it is not so brilliant, more of a blue gray.

Using my number 6 flat bristle brush, I started around the house with this blue/purple color, this is the underpainting for the snow. Where it might be in a more sunlit area add just a touch more white, if it is in a shadow area you can add a touch more blue to start the shaping process, it is important whenever you are painting white you need to under paint it in some form of blue or purple or a combination of the two or a soft, cool grey, white will not look white unless there are contrasting colors - darks and lights.


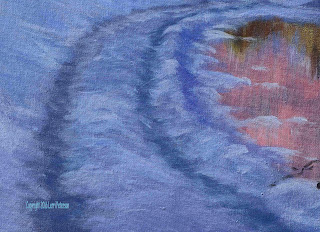
Remember whatever you are painting your brush strokes need to follow the shape of the thing that you are painting. When you are painting the drifts of snow up against the house be sure that you are using comma type stroke as the snow drifts up against the house and don't make the edges even, the snow doesn't come in and aligned perfectly all the way around the house it comes up in, piles up on top of things, you don't know what is around the bottom of the house that may be under the snow creating these different shapes. If you are trying to make a hillside or a larger drift of snow be sure that your strokes follow the shape of that drift, flat strokes will make it look flat so you need to have some curves strokes following the shape of what you are painting. This is especially true when it comes to putting in the ruts in the road the ruts are embedded into the snow so your strokes should be more like “U” shapes and as it comes up out of the rut it flattens out or slightly mound shaped to create that sense of it going from high to low.

The reflection is usually what causes beginners some problems because they try to create a mirror image and it's not exactly a mirror it is either frozen water or almost frozen water so the image is going to be distorted, plus there may be some distance between the water and
the object that is reflecting such as the cottage. Remember when you want to know what will be reflected into the water measured either with your fingers or the end of a brush, putting one point at the top and finding the bottom of the object with the other, then moving that top point down to the bottom and see where the bottom point shows up in the reflection and that will be the top point of the reflection (please see photograph).

Once you have determined what is going to show in the water you might want to lightly sketch it in with your chalk or charcoal do not try to make an exact copy of what is above and it might serve to make a rather fuzzy line when drawing in your cottage reflection.

Using similar colors to what you used for your cottage and using a bristle brush pull straight down you want this to be afuzzy reflection so you want to pull the strokes down no matter what the color or the shape is above, just pull color down with your brush to fill in the area. See photographs.

Be sure to also include the snow and you can use the color you used to under paint the snow just add a touch more white into it and pull it straight down it does not have to be exact. You are also going to be pulling down the colors from the sky which will be your alizarin crimson and white with a little touch of the cloud grey here and there pulling straight down and blending as you go. Don't worry if some of that paint gets into your cottage or vice a versa that will make it look more realistic. Try to work as fast as you can and while the paint is still wet, rinse your brush, and lightly pull across the reflection horizontally. The key word here is “lightly” you just want to disturb the downward stroke that you had just put in.

Please try to get as much of this under painted as you can, our time is growing short and we have a lot to do so you need to be at least to this point when we meet again. Until then, keep painting and I will see you in class.

Sunday, February 7, 2016

Winter 2016 Acrylic Class

Winter 2016 Acrylic Class: Cozy Cottage Week 3

By this time you should all have the background of your painting in, that's the sky, the distant tree line in the back, and the closer forest of trees behind the cottage. This week we are going to be putting in the pine trees the deciduous trees and also base in our cottage.


If you need to do a light sketch so that you know where things are going to be when you put your pine trees in, the house sits on about the top third of the canvas and the front corner of it is about a third in from the right side. Remember, this cottage is in the distance so don't make it too big, just big enough to be inviting. Also don't be afraid to paint over the lines you sketched in they are just a suggestion of where the house is so you know where to put your trees if you need to make adjustments later you can.

First, I put in my pine trees with a mixture of Hookers green and ultramarine blue with a little touch of sienna in it to gray the color. You might also need a very little touch of white or any grey on your palette so that the green does not look black, it should not be the darkest color because of where it is in the painting.

I was using my number 6 flat bristle brush to create the pine trees, however, you can use a round brush or even a sable brush but any of them will require you to practice before you start on your painting. Using my flat bristle brush, when I loaded the paint onto the brush I drugged the brush through the paint on both sides this creates a fairly sharp edge at the end of the bristles. Using that sharp edge I created the top of the tree making a line by touching it to the canvas, after I came down about a half inch then using the corner of the brush, touching the canvas with the corner and making a quick flip of the brush, I started making the branches of my pine tree. This does take practice because if you stay on the canvas too long you will get a longer stroke so you have to learn how to lift as you flip to create the shorter branches, you also want to be sure that as you go down the tree you are creating an interesting shape and that you are bringing the branches in front of the tree as well as the sides, you don't want to have what looks like fish bones sticking up behind the house. Practice before you start on your painting.

Next using my liner brush I put in the two deciduous trees that are a little closer to the house. Again if you have never use the liner brush or are not comfortable with using your liner brush please practice this before you go to your painting a little bit of practice will go a long way.

As I stated last time, when we were putting in the forest of trees behind the house, loading the liner brush and learning how to push and lift it are critical to the success of this little brush. Remember that your paint should be like India ink it will run but it runs slowly and when you load your brush you want to really roll the bristles in the paint and as you lift off the palette, you roll it between your fingers to create a point, then practice your trees with a push, drag and slowly lift. Push, drag and lift. You can get some very fine lines with the liner brush if you practice. When you go in to make branches start in the tree trunk or in a fatter branch then push a little bit, start to drag and then lift and pull off in a different direction. This is a wonderful way to make trees and bushes but you do need to practice it so that you feel comfortable with the brush.
 
One thing I did do was mix up what will be part of my highlighting color for the snow and that was a good dollop of my gesso and a tiny touch of orange. You will be surprised at how strong the orange color is if you get too much of it you just want a little hint of color in the gesso, for the most part, I will be using this instead of pure white in most cases because white alone can look too  chalky.

Going back to my number 6 bristle brush and picking up some of that light orange/white color that I just mixed, using the dry brush technique I lightly glazed over the snow in the background behind where the house will be. I wanted it in between some of those trees in the background and around the trees that I just put in so I was using it on its small side and with kind of flat, banana-type strokes, put in little mounds of color to suggest the snow in the background. You want to see some of your under color because the underpainting that we did becomes shadows and texture from here out, we are not trying to cover it all up it is important to our painting so don't cover it entirely just glaze it on. Look at the photo from my work and you will see that you can see the gray underpainting underneath the white I put on.

Now you may want to sketch your cottage in a little better so that you know where you need to paint. Watch your perspective on this and watch that little side part of the house. there's a bigger main house and then a smaller room that juts out in front, they all have their own perspective to them so keep that in mind as you're sketching in.

We are going to under paint the house there is a sunny side (the front and tops of the building) since the Sun is coming in from the low left hand side of the painting. The front part of both of those buildings will be a softer warmer color and the sides will have a cool color. The warm color was made with burnt sienna, a bit of white and a little yellow and whatever mud is left on the brush. I painted this in in a scumbling motion (every which way), it doesn't need to be exact it can be a little bit off in its shape because this was a house made with stones and those stones are of different sizes and shapes. The front of the little building and then the front of the longer building are this color once you get those painted in, add a touch of purple and/or blue to the color and a little touch of white to create the shadow color for the building. Again, this doesn't have to be perfect because this was a hand built house with field stones.

The roof of the building is made of thatch and what that is, is long grass that they sewed on to the roof with wire or rope or heavy cord and it is in thick layers, when you are putting on your color for the roof you want to follow the angle of the roof as you are painting it. Don't worry about the snow right now just pretend it has no snow on it, that will come later, using the color you used for the house add in a little more white and touch of orange and yellow to it to warm it up a bit, use this color for the top of the longer house following the angle of the roof the top. The top and corners of the roof are not going to come to a sharp point because of the thatched roof, it will be rounded off as well as the corners at the bottom. When you are done with the sunlit part of the roof on the bigger house, add a little blue into your color for the shadowed side of the smaller house, again follow the angle of the roof as you put this color on your building.


This is where we left off so please try to get your painting to this point we have a lot to cover and we are reaching the halfway point to our semester and we have a lot to do so get ready to work be there on time and I will see you in class.

Saturday, February 6, 2016

Winter 2016 Acrylic Class

ACRYLIC WINTER 2016:  Cozy Cottage Week 1

This week we got started on our English cottage in a snowy setting, I first want to reiterate you do not need to start on a toned canvas, I just toned mine to show you that if you have an old painting that you don't want to save and you want to repurpose it, you can paint it out and have a new canvas to work on, also some artists like to start on a toned canvas but it is not necessary for this project it was just an option.

Usually, when you start a painting, you want to start in the background when we are working an acrylic painting because you want to be sure that you get the things that are in the background of your subject included in your painting. In acrylics we don't have to worry about painting over anything so we can paint our backgrounds in as if there was nothing in front of them and then as we move forward in our painting and paint the things that are closer over what we have already painted so we don't have to worry that there might be halos around our subjects.

The sky area is about one quarter of the canvas from the top. If you need to mark it just draw a simple line, you do not need to do any other kind of drawing, use your soft vine charcoal and blow off the dust, the charcoal won't hurt your paint but it can be a little messy which bothers some people.

Next, take your gesso and put a coating on the quarter top of your canvas. You don't need to be exact you can go over your line if you drew one in but you want a good application of gesso, not real thick, you want it so that when you touch the canvas with your finger that very little of your skin color shows through the paint on your finger. If you need to, you can spray your canvas with water first, which I recommend, and then add a little water as you apply the gesso if you are using the thick gesso, we will be blending into this with our colors so your gesso needs to stay wet. I was using a #12 flat bristle brush to get the area covered quickly, however, if you are working on a smaller canvas a #8 or #10 will be big enough, just don’t get out the small brushes just yet.

On your palette you will next mix a gray color using ultramarine blue, a little touch of burnt sienna, and even a little touch of purple, along with white (gesso) to make a cool grey. If it looks too warm (brown) or too purple you will need to add more blue and white, you want a light, medium gray color. I was still using my number 12 flat bristle brush but if you are using a smaller canvas you might want to use an 8 or 10 bristle brush, again, don't get out the small brushes you want something that's big enough to put the paint on quickly.

In this area that you have put gesso about the top half of it will be this gray color and you will brush it on using comma-like strokes, going up into the sky. It's a rather push and swish motion, you want the sky to look like the clouds are windblown so start at the bottom and pull up or press and pull down as you're making these, strokes and lightly blended once you've gone across the top of your canvas. It doesn't need to be perfect you may even add other colors while you are putting the clouds, add in touches of more blue or more purple (be careful with the purple it is a strong color), we will be putting some red in there soon but just make the sky so it is not a solid, homogenous, gray color you want there to be movement in the sky which translates into lighter and darker variations in color.

Rinse your brush and then on your palette take alizarin crimson and white to create a pink color. If you do not have alizarin crimson use your napthal red or your cadmium red light with a little touch of blue to cool the color, it should still look pink when you add the white you.

Now starting at the bottom of the area you covered with gesso, start streaking this pink up into the sky just like you did the grey even pulling some of that pink up into the grey. You should be working wet into wet so that your colors will softly blend if you are careful with them, if you get too much gray on your brush wipe it out and reload with the pink, you do want a bit of blending with your colors.

While this area is still wet you want to continue painting. Right along the horizon line (the bottom of the gessoed area that is now pink) is a line of trees or it could be distant hills they are too far away to know exactly what they are, for this you need to mix a soft purple/grey color. I usually mix down in a color I already have so in that pink that you just mixed add a little more blue and maybe a touch of burnt sienna because you want a soft greyed/purple color and you want it to be about 1 to one and a half times darker than your sky. It should still be pretty light in value because it is in the distance so don't add too much of the blue or Sienna, if you need to you can add a little more crimson to purple it up and white to keep it light.

The area is of distant, deciduous trees, they have rounded tops and they are very uneven so when you are painting this area you want to be sure that you're not painting either a hedgerow or a cityscape, I saw a lot of that in class. You have to think of the shape of what you are painting before you put brush to canvas. I create the rounded shapes by using my brush on the end using one corner as a pivot point and the top corner to create the top edge, pulling in as I pivot on the corner. I do this rather quickly trying not to think too hard about what I'm doing other than to create an interesting shape. I leave gaps; I make some taller, others shorter as I am going across my canvas creating these distant trees. You may want to practice this before you start on your canvas, but it does help if you are working into the wet paint on your canvas so the colors blend and the edges soften.

I was still using my number 12 flat bristle brush when I created the distant trees cross the background but I did not cover up all of the pink, I maybe went up third of the way into the pink but that pink is important to show time of day so don't cover it up when you do your tree line. Once I put in this line of trees I took my brush on its side, using long flat banana-type strokes softened the bottom edge of the tree line so I had no hard lines this also becomes the snow in the background behind the cottage. Be very aware of hard lines and soften them before they have a chance to dry or they may come back to haunt you.

Once I had the distant line of trees in I let it dry. I wanted to put the next distant trees in, the ones that are right behind the cottage, but I did do some more underpainting of the snow that is on the ground coming down about to the top third section of my canvas. If you still have some of that grey you used in the clouds, you can add a little more blue and white to it. You still want your color to be a soft blue/grey and I'm still using my number 12 flat bristle brush and I was using it on its small side, using the long curved banana strokes as before. You also want a very dry brush which means once I load my brush with paint I want to wipe out any excess paint that I have in my brush and then squeeze the brush at the base of the bristles with my paper towel to get out any excess water, then lightly touching the canvas with the brush, I was scrubbing the color on with those long curved strokes. You will see some of the canvas or under color if you are doing it correctly, if you are working on white canvas you will want to cover all the white so press a bit harder. Take this color back to that tree line you just put in and come down with this color so about the top third of your canvas is covered. If you have toned your canvas ahead of time, you want to see some of the underpainting, it becomes more shadow and texture; if you didn't underpainting your canvas to start, you will want to cover this pretty solid though seeing some of the white canvas won’t hurt this painting. Let your canvas dry at this point.

While your painting is drying you could take the time to practice with your liner brush. This little brush does some amazing things but it does not happen as if by magic it only looks that way once you have practiced it - which I encourage you to do - because it is very hard to learn something when you are too focused on doing it right on your painting so take an old canvas or piece of paper or something other than the one you're working on, and practice with this little brush.

The key to the liner brush is getting the right consistency in your paint this is the one time I will tell you to add more water to your paint, it should be the consistency of India ink: Just a little bit slow in running but not like it's pure water you want a little bit of thickness not too much. The next key thing is loading your brush: You want the whole brush down into the paint, wiggle it around and then as you pull it off of the palette you twist it between your fingers and pull up so that you are forming a nice tip on the end of your brush.

With your brush loaded you want to hold it at the very back end of the handle and you want to hold it at a slightly downward angle so that the paint can flow out of your brush. You will be doing trees and to start a tree you want to press slightly on the canvas with your brush and as you pull up you are also pulling away from the canvas so that the line gets thinner and thinner and thinner. Practice this first before adding branches to it. Once you get the feel going from thick to thin then you start back in the thicker trunk and as you pull up then you literally branch off to create your first branch. It is better to start back in either the trunk or thicker branch and branch off rather than trying to start a branch somewhere along the trunk or the limb you just painted because you can end up with little X's or something that sticks out at an odd angle so follow your trunk or a branch and then go off in different directions you will get a much nicer tree that way.

The trees that you will paint in the background If you still have that purple color you used to make the distant tree line, add more blue and a little touch of burnt sienna to make a warm plum color. This color should be about one to one and a half values darker then you tree line, these are still in the background in the distance so we don't want them too dark or too colorful they can be a bit on the burnt sienna side and it won't be a problem.

Most of the trees that I made were just lines going in all directions. I did make a few that looked a little more like trees but for the most part I just pulled up lines and pulled branches across some of these lines these are too far in the distance to see much detail the ones that are closer to you should have some distinguishable branches and trees but the ones that are further back in your painting just need to be lines that look believable so don't waste too much time sweating over creating the perfect tree each time because if it’s a mile away you're not going to see that much detail.


This is where we ended for the day so I would like you to try and get your paintings to this level before next class again you want to practice with this little liner brush we will be using it again later on as we get into some of the closer trees and bushes and the grass is that are in this painting so keep painting and I will see you in class.