skip to main |
skip to sidebar
Project: Apple Turnover Revised - Week 4
I started out the last class by correcting things that were bothering me. When I am sitting here writing the blog posts, I see things in my own painting I don't like, it isn't easy to talk and paint at the same time, but rather than correcting them at home I correct them in class so my students can see that no one died and yes, you can just paint over things you don't like about your painting and the art police won't come take you away.
I say that in jest but often times I find that beginners, in any medium, think that every stroke has to be perfect and it is isn't your painting and world are doomed. Far from the truth, every artist makes changes when things aren't working out the way they hoped because what you see in your head isn't always what ends up on the canvas so we need to make changes.
The thing that bothered me most was I hadn't made the basked and apples big enough for the size of the canvas. I had a lot of doing nothing negative space (anything that isn't the basket or apples) that was just unappealing to the eye. So I needed to make the basked bigger first using the same colors I used before (see previous posts). I expanded the size of the basket and had to redo some of the handle.
Next, I made some of the apples, particularly the ones on the table, larger.
I made the front green apple larger and more in front of the red one but it looks like I still need to shape the red one a bit bit I am happier with my design now though I am still going to add some things at the end to break up those large areas of negative space.
Next I got to work on the detail of the basket. Be sure that you have your reference photo in front of you so you can check the shapes and directions of the weave of the reeds of the basket. Look at how they spiral around the handle, or how they form lazy "S's" around the top of the basked and "U's" along the sides. See how they change directions as the go around the basket or handle. See these things firs BEFORE you start to paint, it will save time in the long run.
I used my #4 flat sable brush because it has a nice sharp edge that I can control better than a bristle, you can also used a round sable brush if you don't have a flat one. I mixed a light color of yellow, a tiny touch of purple and white to lighten, this is my base color. To this color I added orange and sienna when I needed it to be darker and warmer like inside the basket (look at the photo you will see how warm the weave of the interior is). This is not my final highlight I am just getting started.
With the sharp edge of the flat brush, I used it to make the weave of the basket, referring to the photo almost every stroke for color and shape. I also mixed a dark color of ultramarine blue, sienna and a touch of white to add the shadows to give the weave more depth. I was careful to lightly blend light and shadow to avoid hard lines.
I also used that dark color to add the separations between the slats of the table using the same brush. Also by just tapping the edge of the brush I can start to add some of the cracks in the table but we will do more of that in the next couple weeks as we finish up this painting.
This is where I finished up last class so I hope that everyone who is painting along can get caught up to this point. We only have a couple weeks left in the semester so we need to buckle down and get this finished.
So keep painting and I will see you in class.
Project: Apple Turnover Revisited Week 3
This week I finished under painting the green apples. One thing I want you to notice are my brush strokes. I was using a #6 flat sable brush to paint my apples. I was trying to follow the shape of the apple, so the sides were slightly curved strokes going around the apple but when I got to the top I switched my strokes so they curved over the top slightly angled towards the center of the apple.
Your eyes pick up on very subtle things like brush strokes and they do affect the overall final product. Brush strokes also add some texture to what you are painting as well.
I did a separate demo for the apple to make it large enough for people to see. My main color was sap green though if you only have Hooker's green you will have to add a bit of yellow to warm it up.
To darken the green I used the ultramarine blue, to lighten I added yellow and touches of white (gesso).
I started out in the darker parts of the apple and I was "brush blending". What that means was I was doing very little mixing on my pallet doing most of the mixing on the apple. While I did start out making a blend of sap and blue on my pallet, and added it to my apple, my next step was to pick up the green and blend it up a bit of the way up the apple. My goal is to make a smooth transition from the shadowed part of the apple to the light side of the apple. Look at your reference photo to see where the light is coming from (upper right) and see how it falls and shapes the apple.
As I got into the lighter areas I didn't add any more of the darker color but added yellow and little touches of white to the green. Only in the center did I go back for a little of the darker color but used my strokes to blend into it so it isn't too dark at this point.
This is the base for our green apples, not the finished product that will come later.
Since I had several people who had missed a class or two, I didn't want to get too much ahead of them, I hate for people to get lost, however, there was still a lot to do like the table top.
I added several more layers to my table top trying to get the look I want. I was using my #6 flat bristle brush to dry brush color on and remembering to leave some of the previous layers of color. I added some light blue, light green and some light gray (white [gesso] blue, green and add burnt sienna to either to get gray), still I wasn't getting what I thought I wanted when it dawned on me I needed the slats in the table. The lines in this photo are just charcoal lines so I could see the look of the table I was going for, when I did that I could see I was near where I wanted it to be. Sometimes we keep trying to fix what is there when it is really something that isn't there yet we need to put in. By adding the charcoal lines I could finally visualize my table top. While I still have a ways to go on it I could leave it there because I do need to fix the lines to make them straight and get them spaced better.
Again, the lines in the photo are just charcoal so you do not need to add them in yet though you may want to bring a straight edge with you when you come to class.
When I get home and look at what I've done in class I see things I want to change and it is much better to see them now than when I'm almost finished. This is one of the advantages to acrylic is you can paint right over it, I will discuss the changes I want to make next time and my reasons why, you do not need to change a thing to yours if you don't want to but you need to see that you can and the World won't come to an end.
So keep painting and I will see you in class.
Acrylic Project: Apple Turnover Revised Week 2
I forgot to take photos as I was going in class, just so you know, I worked on the table top and got it to this point before I added the basket and apples. While this is far from the finished look I want for the table, it was to a point I could add the apples and basket.
I want you to see that I added several more layers of paint using the dry brush technique. I want this to look like an old beat up table so I am adding other colors such as blue and green as well as, yellow and orange. There was also gesso to change the value of the color to add sunlight to the colors.
Because I am not going to use the table in the reference photo for the table I want in my painting, I may need some other reference photos to help, this is why they are called "reference" photos. You, as an artist, can change any part of a photo to make it your own. A photo is just guide, a starting point, it is not an image set in stone, the art police won't come and haul you away if you choose to do "your own thing" because that is what art should be and I want you to get comfortable exploring these changes.
I added a couple of images that I could find that are kinda where I am going with the look of the table in this painting. I do want them to have a warmer, more colorful look but I want them to look beat up and rough. You may want to look for your own texture or even a table cloth if you want.
 Once I had the table close to where I wanted it, I sketched on my design with white chalk. You can also use charcoal and remember, it doesn't have to be perfect.
When you are adding the apples do not be afraid of overlapping the apples with each other or with the basket. It is a common thing to want to keep everything from touching but that is a human thing, Nature isn't like that, things touch and overlap; you have things in front and behind, stacked on top of each other... Those are things you have to be aware of as an artist when you are designing your paintings and it isn't as simple as it sounds because we line things up almost instinctively, just be aware that it can and does happen even to the most expert of artists.
I was using my #4 flat bristle brush and used my reference photo as my guide. The basket was under painted with a mix of colors: I mixed sienna, with a touch of blue and gesso to make a warm gray color. Mix the color a bit on the dark side first then on one part of it you can add more gesso (white) to lighten the color. I added the white while I was painting (called brush mixing or wet into wet painting) starting in the darker area under the basket. The inside of the basket was the same color but with more blue and sienna and I painted well into where the apples are so I was sure that I had the basket color behind the apples. The lighter color around the top of the basket and the handle is just a touch more white and you can add a little orange too if you want.
When the basket was dry, I sketched in the apples and I added an apple towards the back so I didn't have a straight line across the top of the apples in the basket (see the above comment about lining things up) even though this time Nature did it, I didn't like the evenness of it, so I changed it.
To under paint the red apples, I used the napthol red - cad red will work also - my alizarin crimson and to make the alizarin darker, I added blue. You can use a sable brush if you want for the apples, it might be easier to control.
The key to under painting the apples is to reload often. When you try to stretch paint to cover an entire area, it becomes transparent, that is the nature of acrylics or if you use too much water. You want the paint to be about the consistency of soft butter so it will slide off your brush. This takes practice to judge your paint but if you see through your paint you need to figure out what you are doing.
I know it is very tempting to slide your brush around to fill in the apples but you get better results if you scumble the paint on loosely following the shape of the apples. Fill in the spaces between the apples in the basket with color because there are shadows and more apples you can't see under the ones you can. Don't worry so much about individual right now, that will come later, you want to get them all under painted and you can sort them out using the lighter color to suggest where the light is coming from. Look at your reverence photo for this information (hint: the light is coming from the right as you look at it).
The red apples needed to dry before I add the green apples so this is where we stopped for the day. Try to get your painting up to this point if you can and we will continue from here.
Keep painting and I will see you in class.
Acrylic Project: Apple Turnover Revisited Week 1
When we start a new acrylic project, it is to your advantage to start with what is furthest away and things that are behind other things so we don't end up with halos around everything. Acrylics dry so fast the you can paint right over them in minutes without fear of colors mixing where you don't want them to.
I am working on a 16 x 20 canvas board and will be using my #10 flat bristle brush for all of what I did on the first day.
I started this painting by sketching in where the table's edges are with my soft vine charcoal and that is all the drawing I needed to do at this point because I will be painting over these lines just to be sure I get my background behind the table. The charcoal or chalk does not hurt the paint and is easy to remove with a damp paper towel to make changes.
Using a series of crisscross strokes, I picked up 2 or more colors at once and blended them on the canvas. This is called "brush mixing" and is a great way to create variations in color when painting something like a background - like these leaves or under painting for rocks, or water - just about anything you paint to give it more color and texture.
I started out using Hooker's green, ultramarine blue and a bit of purple and adding other colors like yellow, orange, touches of red even a bit of white (gesso) along with the green, blue and purple. I was very aware of the brush strokes as I was doing this because I wanted my strokes to look like out of focus leaves so these strokes are quick, short strokes.
A tip: Don't try to stretch a brush load of paint across the entire canvas, reload often and watch the water. Your paint should be the consistency of soft butter, a little water goes a long way. If your paint is too transparent or if it looks like it is running down our canvas, you have too much water.
After my leaf background was dry, I used some white chalk to re-establish the edges of my table (see top image). to make the edges of the table so I didn't have a hard edge, I used the flat edge of my brush and pulled down to form the edges, once I had the edges established, I used a similar technique to fill in the under painting for the table as I did with the leaves, but this time I made longer flatter strokes, using burnt sienna, ultramarine blue with touches of red,yellow orange, purple, and gesso.
This color needs to be darker than the final color because this color becomes part of the texture of the table and the base for the next step.
Once the under painting for the table was dry, using the same flat brush I used a dry brush technique to start adding the texture to the table.
This time I mixed color on my palette using yellow, a touch of orange and burnt sienna along with gesso (I used this instead of white), to make a lighter, but not the lightest, color.
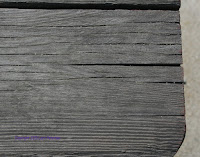
After I loaded my brush, I wiped some of it off so I didn't have much paint on the outside of my brush, then using very little pressure on my brush I skimmed the surface of my canvas trying to make my strokes as straight as possible going across the table area. Look at the image here, you can see how the dry brush leaves some of the previous color exposed, you can even see the texture of the canvas, that is what you want. You can do this technique with different colors and values, always leaving some of the previous color exposed until you have wood that looks like you can get splinters from it, you just need to be patient with the process and watch it develop.
BTW, if all you have is a sable brush, you can do a similar technique with your brush, again watch the water, sable brushes hole more water than bristle brushes do, you might have to squeeze the bristles near the metal ferrule and at the same time you can fan out the end of the brush so you cans see individual hairs. use a light touch and reform the brush often but it will work.
This is where we left off at the end of our first class, I think we will need to do one or two more dry brush layers before we get to the basket of apples but all in all, I think we have a good start getting the canvas covered.
Keep painting, I will see you in class.


