I want to remind everyone that what we are doing this time in class is a series of studies to focus on learning to see value and shapes. We will only be taking one week on each study so if you do not get finished in class, you will need to finish at home. These don't have to be perfect, it is more important that you understand the values and how to use shapes to create a painting rather than to have a perfectly rendered piece on your canvas.
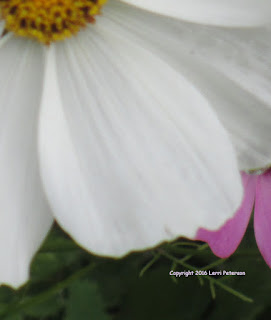
This week we start with a simple white flower - or so it seems. One of the aspects of painting I want you to understand is that your brain will lie to you. Your eyes see the subject as it is supposed to be but the filters in your brain tell you something different. You see a white flower but if you listed to your brain, your flower will have no depth or texture it will be flat and lifeless. As an artist, you need to see through those filters to see what is really in front of you.
When ever you paint white you are going to start out with some form of gray or blue gray or lavender gray depending on the light and the subject. I mixed a gray that was about the medium gray I saw on the flower using ultramarine blue, a little touch of burnt sienna (the sienna can easily over power the blue so tiny amounts) and white to change the value to the medium light gray I wanted. I checked this by holding my value scale over my paint and squinting through the hole. I f the color disappears against the shade I gray on the scale then tat is my base gray. I made enough for the flower and then some, you use a lot of gray in painting so having a pallet that will keep my paint fresh is handy.
Have your photo and your value scales out, you will be using them for this painting.
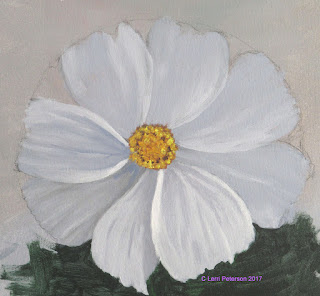
I under painted all of the petals with this light gray which was just a little bit darker than the first gray past the white on my gray scale. None of the flower petals gets much darker than about a 4 on the scale, even the darkest parts. Only the yellow center gets to about a 5 on the scale.
To create lighter and darker shades of gray for my flowers texture and wrinkles starting with some of the gray I had already mixed to make it darker I added a bit more blue and sienna to darken it (check it with your value scale) and with my gesso (I use for my white) to make a lighter version of the gray.
For the very whitest white - and there are only a very few places that are really bright white - I didn't use the pure white gesso because that can make the white look too cold, I took a bit of the gesso and added a very tiny - I mean tiny - touch of orange to lightly tint the gesso to warm it up just a bit.
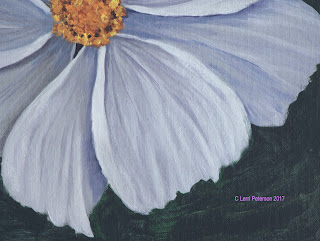
 I used a lot of dry brush (very little water or paint on my brush) to get some details in looking to see that the darkest parts of the flower were at the center and where they went under another petal. Always follow the shape of the thing you are painting, look at the wrinkles they are not straight they are curved and the start and stop.
I wan't too worried about the outside edges of the petals because I knew I was going to come back in with a dark color to go around the flower so I could use this dark color to shape my petals better and give them that irregular ragged shape on the edge.
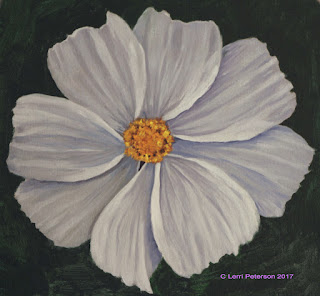
Another thing adding a dark background helped do is to make the flower look white even though it is mostly shades of gray, using the contrast behind the flower creates the optical illusion that it is much lighter.
I had to finish my painting at home to show you what the finished study should look like. the center was under painted with sienna and orange then finished with a mix or cad yellow light and a touch of orange and just tapped on with some sienna and blue for the dark spots.
Next week we will be doing the leaf so please try to get your leaf on your canvas before class, I will show how to transfer a drawing done on paper to the canvas for those who are having trouble.
Keep painting and I will see you in class.


