
The
first thing I had the class do is pre-mix a medium gray color. We will be using
a lot of this base gray so mixing a pile of it if you have a way to seal your
acrylics when you are not using them, this is a good way to go so you don’t
have to stop and remix each time.
I
used my standard gray mix of ultramarine blue, burnt sienna and a tiny touch of
purple for the color and gesso (white) to change the value. The color should be
on the cool side (more blue than sienna) and should be in the mid-value range
(about midway between white and black), no, mixing white with black will not
get you this color, it will get you a lifeless gray, this mix gives you a more
dynamic gray.

Once
you have prepared your gray, we now start on the canvas by first wetting the
surface either by misting it with your spray bottle or using your 2” blending
brush, you just want the surface to be damp not drippy. Using your blending
brush, make sure you have gotten all the excess water out of it, squeegee it
between your fingers if you have to, you don’t want all that excess water
diluting the gesso or the paint as you apply it or you will get very thin
colors (you will see the canvas thru the paint). Pick up some gesso on your
brush and roll it on to your canvas in a circular motion starting at the top
and working your way down so you have a thin coating of gesso over your entire
canvas. Work quickly so the gesso doesn’t dry, all of the sky is down while
gesso and paint are wet, this is called wet into wet blending so don’t dap at
it. Wipe out your brush, you don’t need to clean it, just wipe out some of the
gesso before going to the next step.
Next,
on one corner of your brush, pick up a good portion of your ultramarine blue
and on the other corner just a dab of sienna and a smaller dab of purple, it
will be mostly blue. Starting at the top again and holding your brush
horizontal, just drag it across the top of your canvas to get the color on, if
you need more – usually blue – pick up more paint and repeat the process, you
want a good amount of color to start the blending process. This is why I tell
you to put out at least inch long amounts of paint when you set up your
palette, some of you don’t even put out a decent brush full then you try to
stretch it across the whole canvas, not going to work, so put out paint!
When
you have the paint striped across the top of your canvas, you will be using big
“X’s” and start blending the color down the canvas. The color will lighten as
it mixes with the gesso you just put on and that is what you want. Keep working
quickly going across then down with this “X” stroke and barely touch the
canvas. The harder you touch the canvas the more likely you will leave brush
marks, the lighter you touch the canvas it will look seamless. Work your way
down about 2 thirds of the canvas, if you need to add more color, wipe out your
brush, reload start up in the darker area and work your way down. This takes
practice but you can get some beautiful skies with this technique.
Only
a matter of a couple minutes have passed since you put on the gesso, it takes
me longer to write this out than it does to do it. Please keep this in mind as
you work.

You
do not need to wash your brush but you can wipe it out if you want for this
next step, I probably didn’t. Pick up some of that gray that you mixed streak
it across the bottom of the blue you just put on, wipe out your brush then
start blending up the same way you blended down, if you need to, you can turn
your canvas upside down if it makes it easier to blend. As you move up the
canvas, pick up some gesso or white on your brush and blend it into the gray.
With both colors you want what is called a gradation – going from dark to light
without indications of separations between values. You should have a light gray
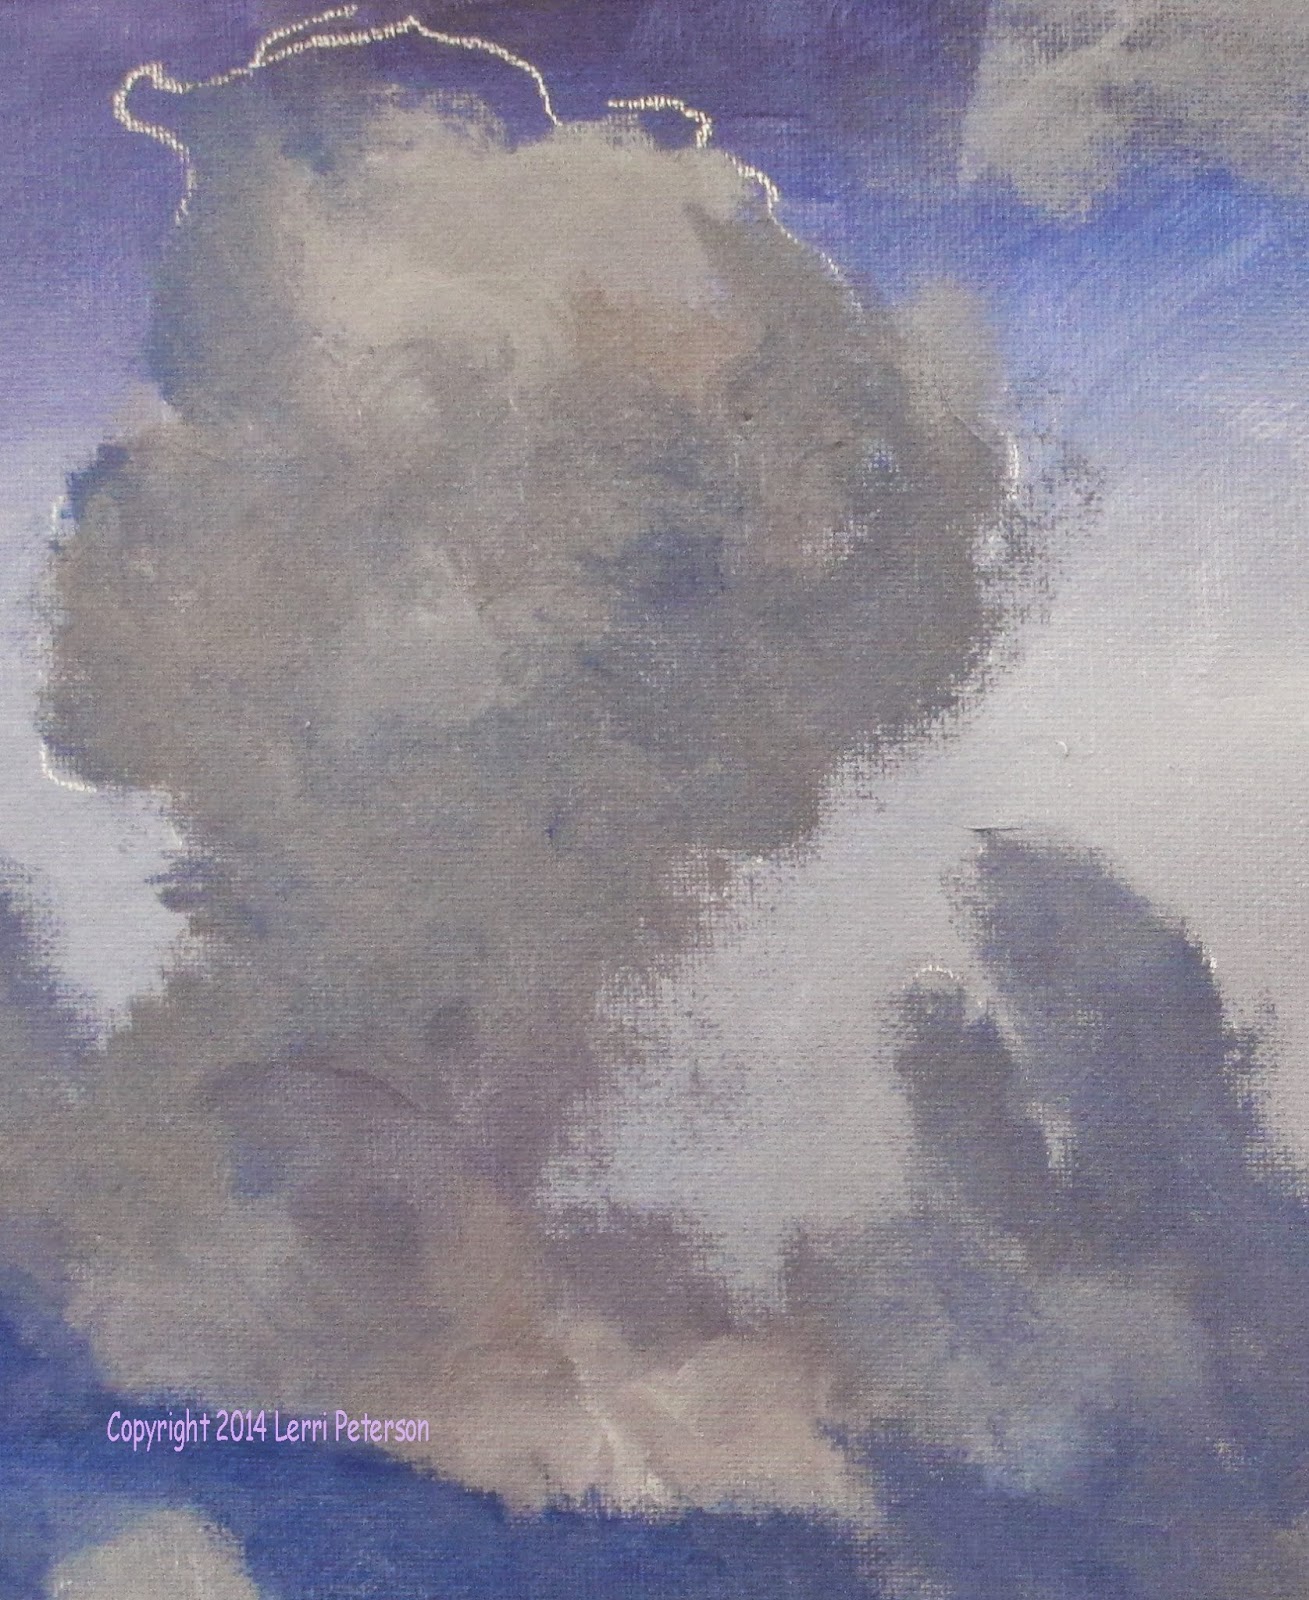
up to the top third of the canvas. Just lightly blend the edges of the blues
and gray, look at the reference photo to see how those high clouds just seem to
disappear, which is what you are going for. Now you can let this dry completely.
When
your canvas has completely dried, use your chalk or soft vine charcoal to
sketch on your clouds and foreground. This is not etched in stone this is more
of a guideline so you know where you need to put paint the key thing is to get
interesting shapes and edges, if it is not exactly like the sketch, don’t worry
about it.
 You
MUST have your reference photo in front of you because it is going to tell you
where you are going to put color and change color within each cloud. I was
using my #10 flat bristle brush, if you are working on a smaller canvas a # 6
or a #8 will work for you but use a bigger brush, not a small one. We will be
doing what is called brush blending which is where you add colors to your
canvas and blend them together with the wet paint already there to create other
colors or values. We will be mostly using the gray we mixed up before we
started and to it we will add blue and touches of purple to deepen the color
and white or gesso to lighten, however, if you feel brave, you can throw in
touches of red or green even orange because if you really look at clouds you
will see all colors in them.
You
MUST have your reference photo in front of you because it is going to tell you
where you are going to put color and change color within each cloud. I was
using my #10 flat bristle brush, if you are working on a smaller canvas a # 6
or a #8 will work for you but use a bigger brush, not a small one. We will be
doing what is called brush blending which is where you add colors to your
canvas and blend them together with the wet paint already there to create other
colors or values. We will be mostly using the gray we mixed up before we
started and to it we will add blue and touches of purple to deepen the color
and white or gesso to lighten, however, if you feel brave, you can throw in
touches of red or green even orange because if you really look at clouds you
will see all colors in them.
Load
your brush with the gray color but not too much, work the paint into the
bristles this will be a dry brush type technique, then start in the middle of
one of the clouds. Look at the reference photo before you paint so you can pick
a place to start, then using the small side of the brush and a circular motion,
start shaping your clouds. As you shape your clouds add

It
doesn’t matter if it is perfect because clouds are constantly changing but you
need to get these darker grays on as the foundation for the lighter, brighter
areas which we may get to next week. Best instruction I can give you here is to
look at the photo and follow it the best you can, don’t put too much paint on
your brush, use a circular motion using the side of the brush and keep the
outside edges of your clouds soft. Be sure you get the cloud color down far
enough on your canvas so that the clouds look like they are behind the
mountains which we will do in a week or two. Good luck and I will see you in
class.

