Acrylics
101 – Wrap Up

 The
last day of class we finished up the landscape painting we started the previous
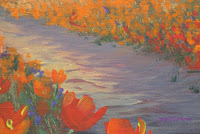
week. The first thing I did was highlight the road. I was using my #4 flat
bristle brush starting on the distant part of the road with a more solid color,
I used gesso (white) and a little touch of orange and yellow to create a warm
bright color and tapped it on the distant road as it goes behind the trees on
the right to the curve. From there, I wiped my brush so I didn’t have a lot of paint
on my brush and coming around the curve, I changed my strokes to a more flat,
elongated “U” over lapping as I came to the foreground and adding touches of
sienna to the white/yellow/orange mixture. When I got to the bottom right hand
corner, I added a touch of blue and purple to create a cool brown color and to
create shadows. (See Photo)
The
previous week I had a brush flip out of my hand and land on the sky part of my
canvas, when I wiped it off some of the sky came with it so I decided that I
would put my sun in that spot. With the same brush but clean, I picked up my
gesso (white) and a tiny touch of yellow to tint the white, then using the
corner side of my brush, starting in the area where I wanted the brightest
light to be, I made a series of small circles and worked my way out from the
center, lightening the pressure on my brush as I went. You may have to let it
dry and do it again if it isn’t bright enough.
 With
the light source present in our painting we do not have to guess where the
light is coming from: It is coming from the back right just above the trees.
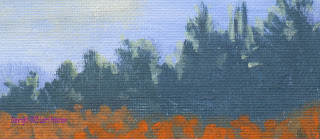
Knowing where the sun is let me add some highlights to the trees on the left
side of the road using the same sun color but adding a little green (Hooker’s
or sap) to highlight the right side of some of the trees and using the same
color to “rim light” some of the tops of the trees on the right.
I
had planned on putting in some closer trees in the painting but one of my
students requested some flowers and I liked the idea so I changed to a poppy
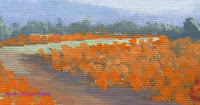
field instead. Again, starting in the distance on the back side of the road and
now using a #6 flat sable brush, I mixed orange, yellow and a touch of white to
make a light orange color. I put this on pretty solid in the distance because
and things go into the distance the 1. Are lighter/greyer in color, 2, they are
closer together, and 3, smaller and little to no detail depending on how far
away they are. These flowers are so far away all we can see is color and shapes
of color. I tapped this light color on up to the curve of the road in the back
with the corner of my sable brush being sure to overlap most of my taps. At the
curve on both sides of the road, I added more orange and yellow and still using
the corner of my brush and still tapping, I made slightly more distinct clumps,
leaving some of the background show through, but these are still just clumps of
color getting bigger and spaced more apart as they come forward.
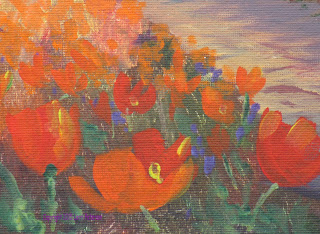
 About
the bottom third of the painting, I used more orange and yellow and this time
instead of adding white, I added some red to the color to make it brighter and
I made more actual flower shapes. Poppies are cup shaped so your brush strokes
need to curve into a central point where the flower attaches to the stem. These
flower shapes will get bigger and further apart the closer you get to the
bottom of the canvas and don’t forget to overlap your flowers and the road. The
detailed flowers will be on the left side of the road, the right will just be
shapes.
To
finish the flowers you can add touches of yellow to some of the centers and
suggest some stems using some green with a bit of blue. Also you can add some
blue and purple in between the poppies to suggest other kinds of flowers.
Finish it out the way you want, you may have to look for some reference images
but don’t be afraid to experiment, this is how you learn.
There
was a lot we didn’t cover and I wish we would have had a bit more time on this
last painting but I do hope that you have been encouraged to continue painting
and exploring the world of acrylic painting. I hope to see you again in class.
Keep painting.


No comments:
Post a Comment