Acrylic
Class Project: Cloud Study Finale
In
our last class I basically finished up our cloud study and how you finish up
your own painting is as important as how you start a painting. You have all
heard me say many times over to stand back and look at your painting especially
when you are getting close to the finish. You cannot judge how your painting
will look when you are standing right on top of it. Some things that look
horrible close up actually look great when you stand back and see the overall effect
to your painting and visa versa.

 When
you stand back and look at your painting and you see something you really don’t
like, now is the time to change it before you go thru all the work of adding
highlights and detail then have to do them over again, check your reference
photo to see if there is anything else you need to change to make it the way
you want. I had this problem with my painting with one of the distant mountains
that I thought I made too tall and I didn’t like the shape where I had it and I
didn’t really like the color of that ridge either. Rather than painting it out
with gesso and starting all over again, I just re-sketched my mountain so I had
a size and shape I liked better then I went into that gray mix (yes, I still
have some of that original gray I mixed on the first day left over) to that I
added in some more blue and purple do darken it to a value close to what was
behind the mountain and painted out the part of the mountain I didn’t like,
blending that color into the existing color with dry brush. There were also
some clouds behind the mountain that I needed to put back in so I worked wet
into wet adding touches of my white with a touch of orange (that was a left
over as well) and touches of gray to re-create the clouds then let it dry
before re-shaping the tops of the mountain and changing the color a bit.
When
you stand back and look at your painting and you see something you really don’t
like, now is the time to change it before you go thru all the work of adding
highlights and detail then have to do them over again, check your reference
photo to see if there is anything else you need to change to make it the way
you want. I had this problem with my painting with one of the distant mountains
that I thought I made too tall and I didn’t like the shape where I had it and I
didn’t really like the color of that ridge either. Rather than painting it out
with gesso and starting all over again, I just re-sketched my mountain so I had
a size and shape I liked better then I went into that gray mix (yes, I still
have some of that original gray I mixed on the first day left over) to that I
added in some more blue and purple do darken it to a value close to what was
behind the mountain and painted out the part of the mountain I didn’t like,
blending that color into the existing color with dry brush. There were also
some clouds behind the mountain that I needed to put back in so I worked wet
into wet adding touches of my white with a touch of orange (that was a left
over as well) and touches of gray to re-create the clouds then let it dry
before re-shaping the tops of the mountain and changing the color a bit.
With
the mountains and the clouds more to my liking, I could start some of the
highlighting of the mountain ranges that weren’t affected. The next closest
ridge I used a mix of sap green, a touch of yellow and a bit of the gray to
dull the color. Remember, it is still in the distance so I don’t want my colors
too intense or bright which is why I added the gray, it should be a much
lighter color than what you have – at least 3 values lighter - and you can use either your #4 flat bristle
brush or a #4 flat sable brush, which ever you feel more comfortable with then
thing about what you are painting: you are painting the tops of ridges and
shelves and rocks and bowl that are up where the sunlight can hit them. Don’t
cover up all of your dark color, that becomes the shadows of crevasses and dips
or the back side of the mountain, it is a good thing. Remember, the light is
coming in from the upper left hand side so it will be the left sides of things
that get the highlight.
The
closer meadow I used sap green, yellow touches of white (gesso) and touches of
orange along with some of the mud that
was on my brush for the color that was on the top of the hill and as I went to
the sides and down the side, I added some Hooker’s green and touches of blue to
create shadows. There is some dirt on the right hand side I used some burnt
sienna with touches of purple and orange, you don’t want this too bright
because it is in the shadow of the hill. Once again don’t cover everything, you
want to leave the darker under painting as the shadows for the crevasses and
texture created by erosion, you can even suggest rocks and out crops by just
highlighting a shape and leaving the dark.
The
dark corner with the pine trees on the right don’t need a lot of highlight to
suggest a forest of trees, you can use the green mix you were just using add a
bit more Hooker’s green and maybe a touch of yellow then using the sharp edge
of your brush, make a series of overlapping, vertical strokes. If this dries to
dark, you may have to go over it again with a bit lighter color but as always,
don’t cover everything, the colors that are underneath act as trees in the
shadows and gives texture and depth to your painting.
While
all of that was drying, I went back in and to the mountains I re-shaped and
cleaned up the top edge with a mix of the gray, a little burnt sienna, purple
and a touch of white to lighten it just a little. I wanted a soft purpley gray.
To make the highlight for it I added a bit more white and it was done.
Now
to finish the clouds. If you don’t have any of the gray mixed, re-mix it same
goes for the soft white (white with a tiny touch of orange in it), you are also
going to need some clean pure white, if you use the titanium, you may have to
go over the white areas again because titanium can be a bit transparent and dry
darker which is why I use gesso. I also finally cleaned my brush out as best I
could so I didn’t have any other colors to contaminate the white.

I was using my #4 flat bristle brush and my reference photo was right where I could see it and I referred to it often during this process. Knowing where your light source is at this point is critical: Upper left and slightly behind the clouds, that is what give it the dramatic rim lighting. All of my highlights will be either on the top or coming down part of the left side, not everything is going to have a highlight, please look at the reference photo before you start this process and really LOOK at where the very brightest parts of the clouds are.
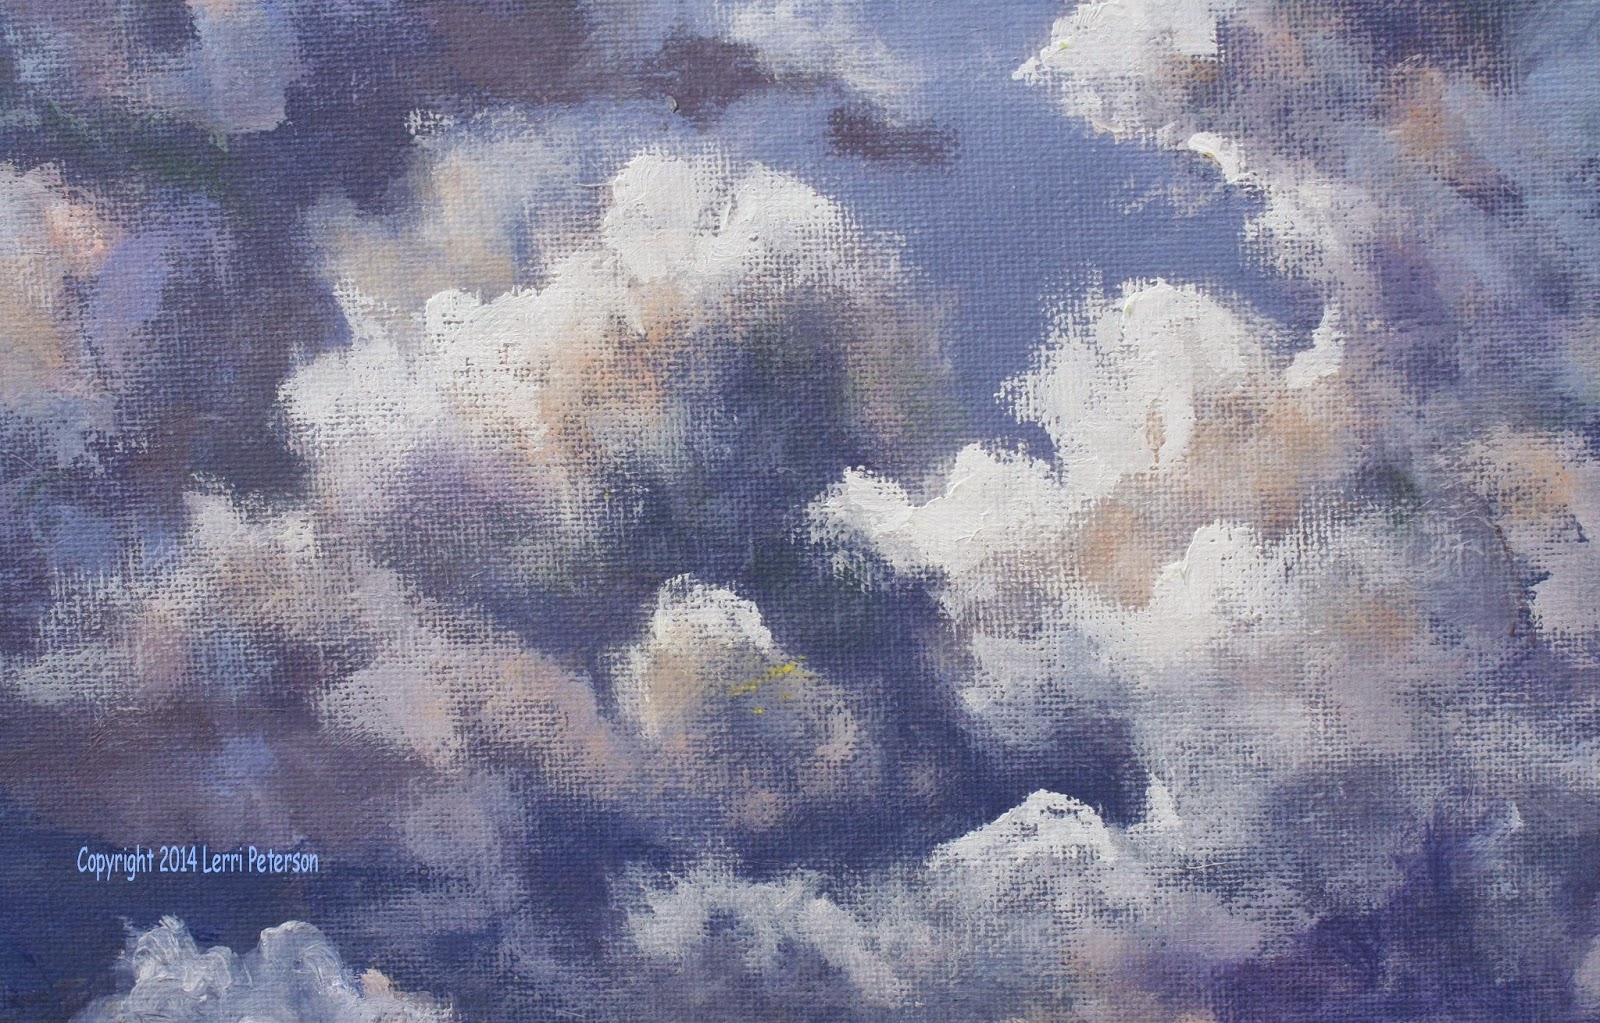 I
picked up a good dollop of straight gesso starting at the top of my clouds I
started creating the top shapes of the clouds, as I worked this color back to
the grayer areas, I picked up touches of the soft, orange white and gray to
blend it into what is already there. This was wet into wet so you need to work
on one section at a time. Please don’t just line the clouds with white, think
about how the clouds are bubbling and churning as they build up, the shapes are
very irregular. Sometimes it is only a little sliver of bright white, other
places soft, puffy white tops, the reference photo will have all the
information you will need to finish up, just don’t overdo the white because you
don’t want to lose all the deep grays.
I
picked up a good dollop of straight gesso starting at the top of my clouds I
started creating the top shapes of the clouds, as I worked this color back to
the grayer areas, I picked up touches of the soft, orange white and gray to
blend it into what is already there. This was wet into wet so you need to work
on one section at a time. Please don’t just line the clouds with white, think
about how the clouds are bubbling and churning as they build up, the shapes are
very irregular. Sometimes it is only a little sliver of bright white, other
places soft, puffy white tops, the reference photo will have all the
information you will need to finish up, just don’t overdo the white because you
don’t want to lose all the deep grays.
The
last thing I did was highlight the trees in the corner. They are closer to us
so we may see more color. The area should have been under painted with a dark
green color, but we can highlight with yellows and oranges even some reds if
you want to make it look like early fall. Trees are a lot like clouds in that
they have clumps that give the tree its shape, the photo didn’t show this very
well so you may have to do some of your own research to see the clumps and how
they connect with other clumps or stand out on their own.
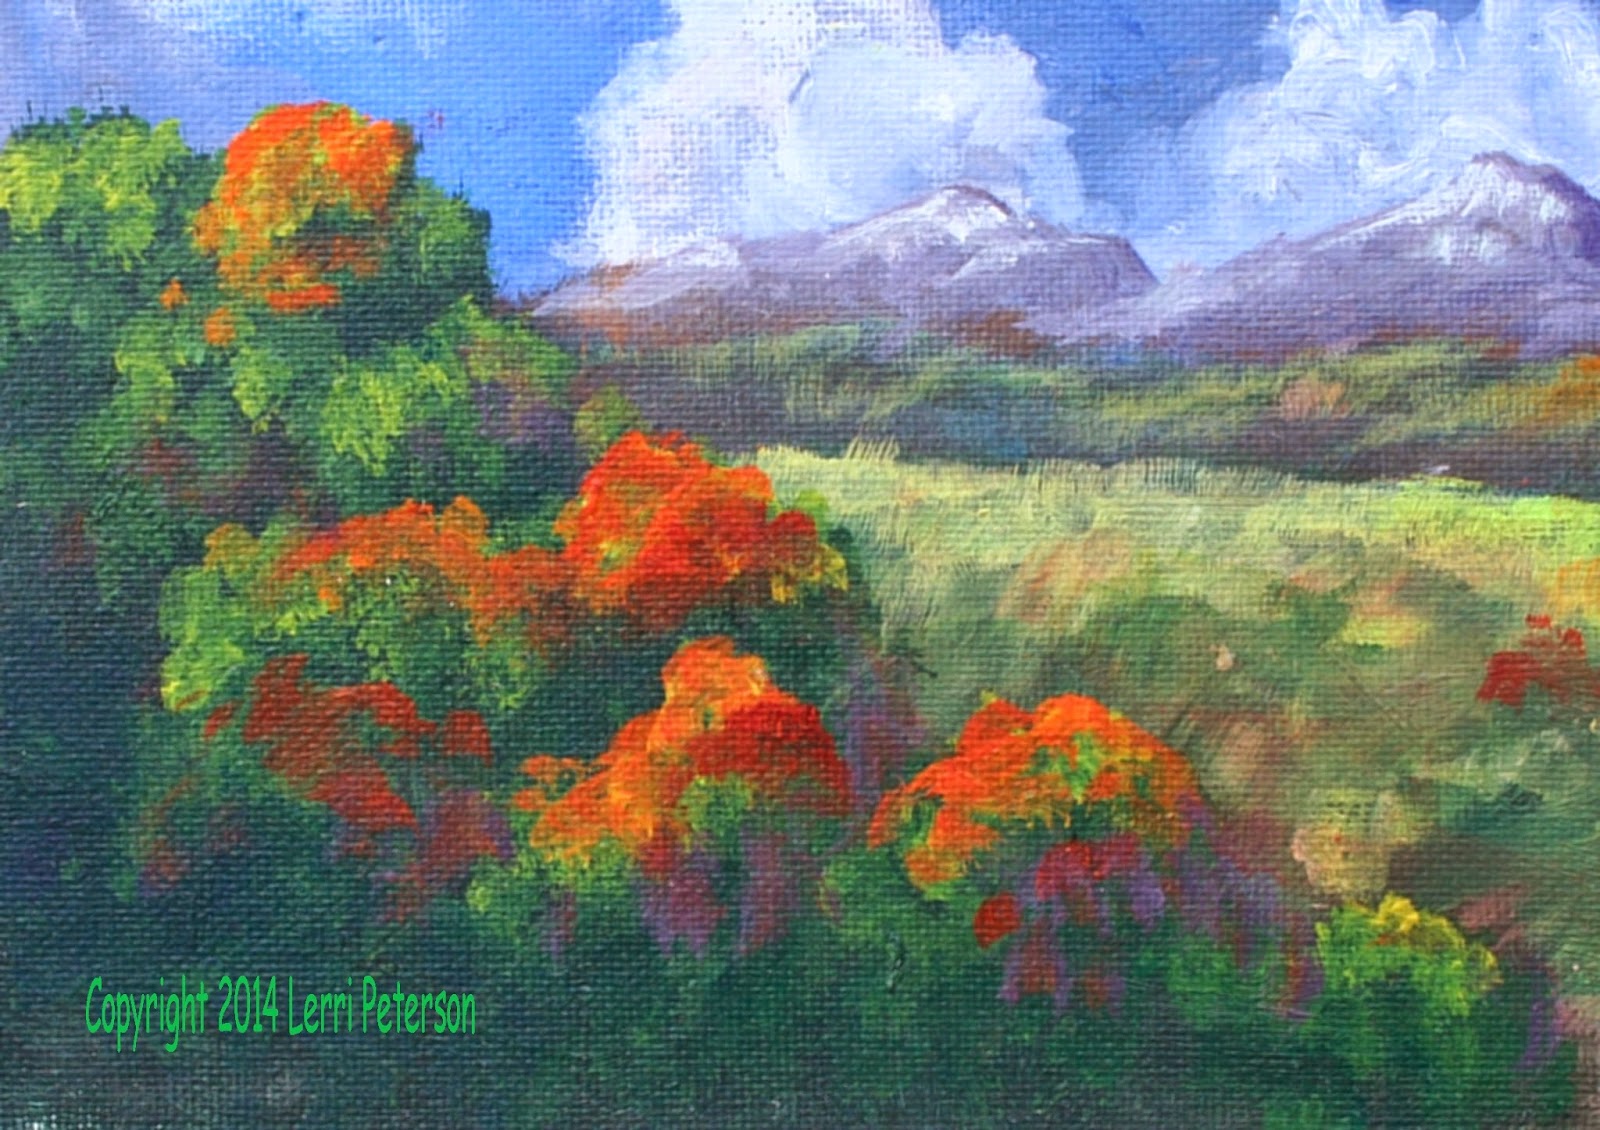 I
did clean the brush again so I would get clean color (#4 bristle still) and I
mixed a bright green with sap green, yellow and a touch of white then I smashed
my brush into the palette to make the bristle fan out. I do this instead of
using a fan brush because a fan can give you too regular a shape and make you
trees look stenciled in. By just gently tapping the brush to the tops of where
I want clumps I can create highlights in the trees. Don’t forget to join clumps
together it shouldn’t look like colored cotton balls stuck to the tree. If you
want to suggest that the trees are changing color you can tap in pure yellow or
orange or red just don’t get too carried away, the clouds are the feature and
the bright colors can distract the viewer from all your hard work in the
clouds.
I
did clean the brush again so I would get clean color (#4 bristle still) and I
mixed a bright green with sap green, yellow and a touch of white then I smashed
my brush into the palette to make the bristle fan out. I do this instead of
using a fan brush because a fan can give you too regular a shape and make you
trees look stenciled in. By just gently tapping the brush to the tops of where
I want clumps I can create highlights in the trees. Don’t forget to join clumps
together it shouldn’t look like colored cotton balls stuck to the tree. If you
want to suggest that the trees are changing color you can tap in pure yellow or
orange or red just don’t get too carried away, the clouds are the feature and
the bright colors can distract the viewer from all your hard work in the
clouds.
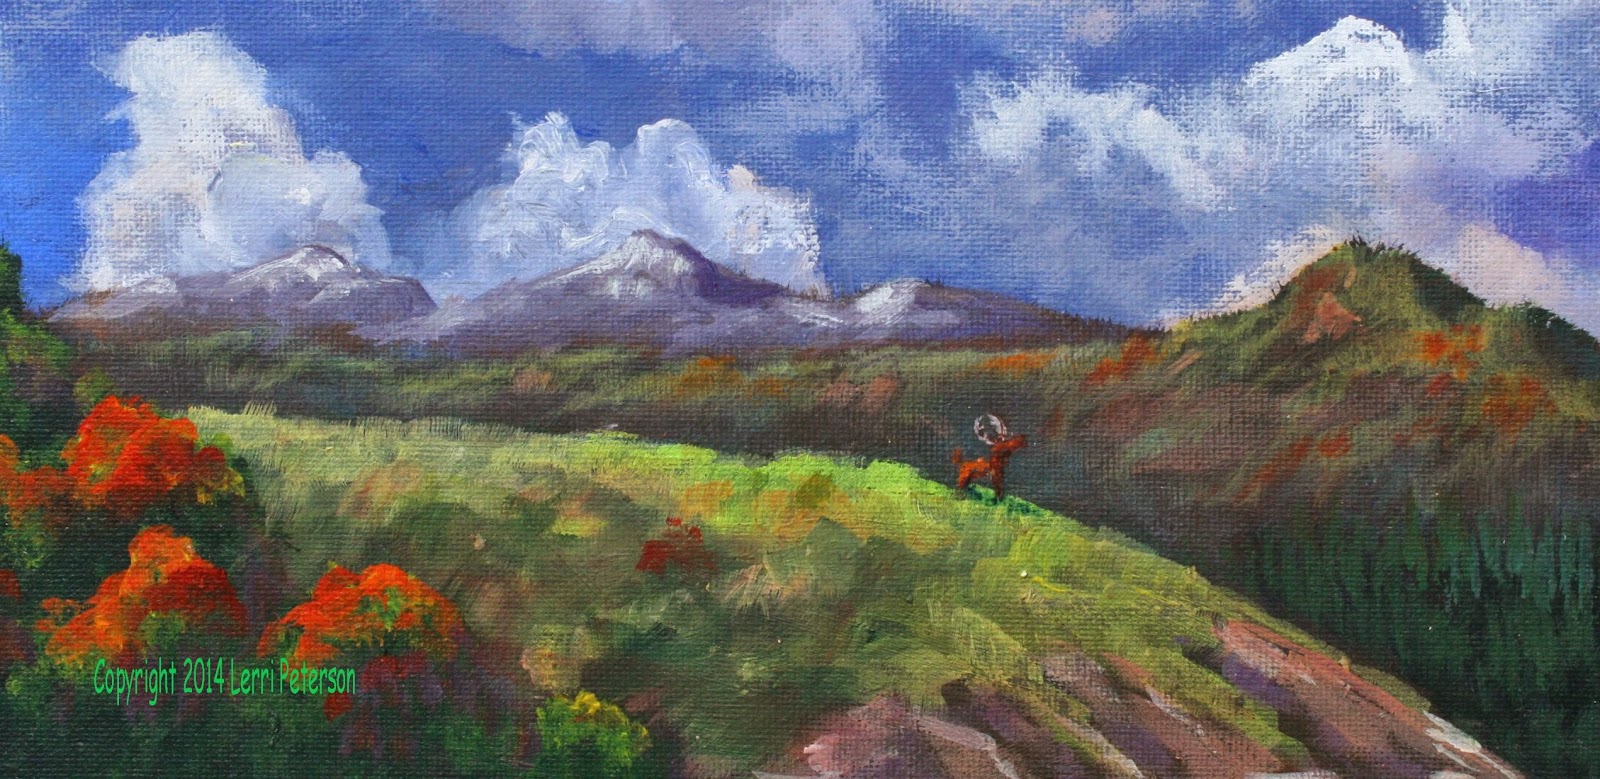
Finish
this up the way you want to. If you want to add a deer or a bear on the meadow
that would be fine just remember that it won’t be a big animal because of the
distance, there also won’t be much detail in it. You can also put in some
closer trees if you want to frame in the right side. Whatever you do, don’t
overdo it, it needs to support the rest of the painting. Sketch it in with your
charcoal first, it you don’t like it you can wipe it off and try again, the
choice to add something else is yours, you do not need to do any more if you
don’t want to.

At
this point the purpose of the project is done though I may finish up my
painting in class as I see things I would like to add to it. Please have something
you want to paint ready for class I can help you get started and I will do mini
demos as needed. See you in class.

No comments:
Post a Comment